Breakfast and Brunch

Amy Cantu

Coconut Bourbon Banana Bread by Amy Cantu

Print Friendly and PDF

I'm of the belief that you can't cram enough goodness into banana bread; it can totally handle it! This banana bread is made with browned butter, big chunks of walnuts, toasted coconut, and a splash of bourbon–browned butter for it's rich nutty flavor, walnuts because my two-year-old is obsessed with nuts, toasted coconut since we were out of chocolate chips, and I cannot stop myself from putting some form of coconut in everything, (here's a short list: Coconut Bars, Buddha Bowls, Coconut Tres Leches Cake, Mango with Coconut Sticky Rice, Olive Oil Granola . . . ) and bourbon makes everything seem a little bit more sinful and therefore delicious. (That was a crazy run-on sentence, and I can't fix it, so just bear with me. It's that kind of day.) The reasoning behind this banana bread is perfectly sound, and I can promise not a crumb will be left behind. No seriously.

Notes: Like any good banana bread recipe, this one is highly adaptable to whatever you have in the pantry. I let the kids pick their favorite "mix-ins", so that each loaf is uniquely their creation. On this day, my two-year-old was adamant about "more and more and more nuts", so I obliged with a whole cup of toasted chopped walnuts. We all enjoyed it immensely, but if nuts aren't your thing, feel free to leave them out. For that matter, add whatever mix-ins make your day happy, (chocolate or peanut butter chips, nuts, coconut flakes, raisins, cranberries, etc.) or none at all!


Time: 1 hour 30 minutes
Yield: One 9"x13" loaf

1/2 cup butter, diced
1 cup all purpose flour
1 cup whole wheat flour
1/4 cup dark brown sugar
1/2 cup granulated sugar
1 teaspoon baking powder
1/2 teaspoon baking soda
3/4 teaspoon kosher salt
1/2 teaspoon cinnamon
4 small (or 3 medium) ripe bananas, mashed
2 large eggs
1/2 cup greek yogurt (any kind)
1/2 cup unsweetened shredded coconut, toasted + extra un-toasted for sprinkling on top
Optional: 1 cup walnuts, toasted and coarsely chopped + extra un-toasted for sprinkling on top

Preheat oven to 350 degrees F. Line a 9"x5" loaf pan with oil and parchment paper (or oil and flour). 

Line a rimmed baking sheet with two pieces of parchment paper (one piece of paper covering each half of the sheet). Place walnuts on one half and coconut on the other. Toast in the oven, removing when they are golden. (5-10 minutes for walnuts and 3-5 minutes for coconut).

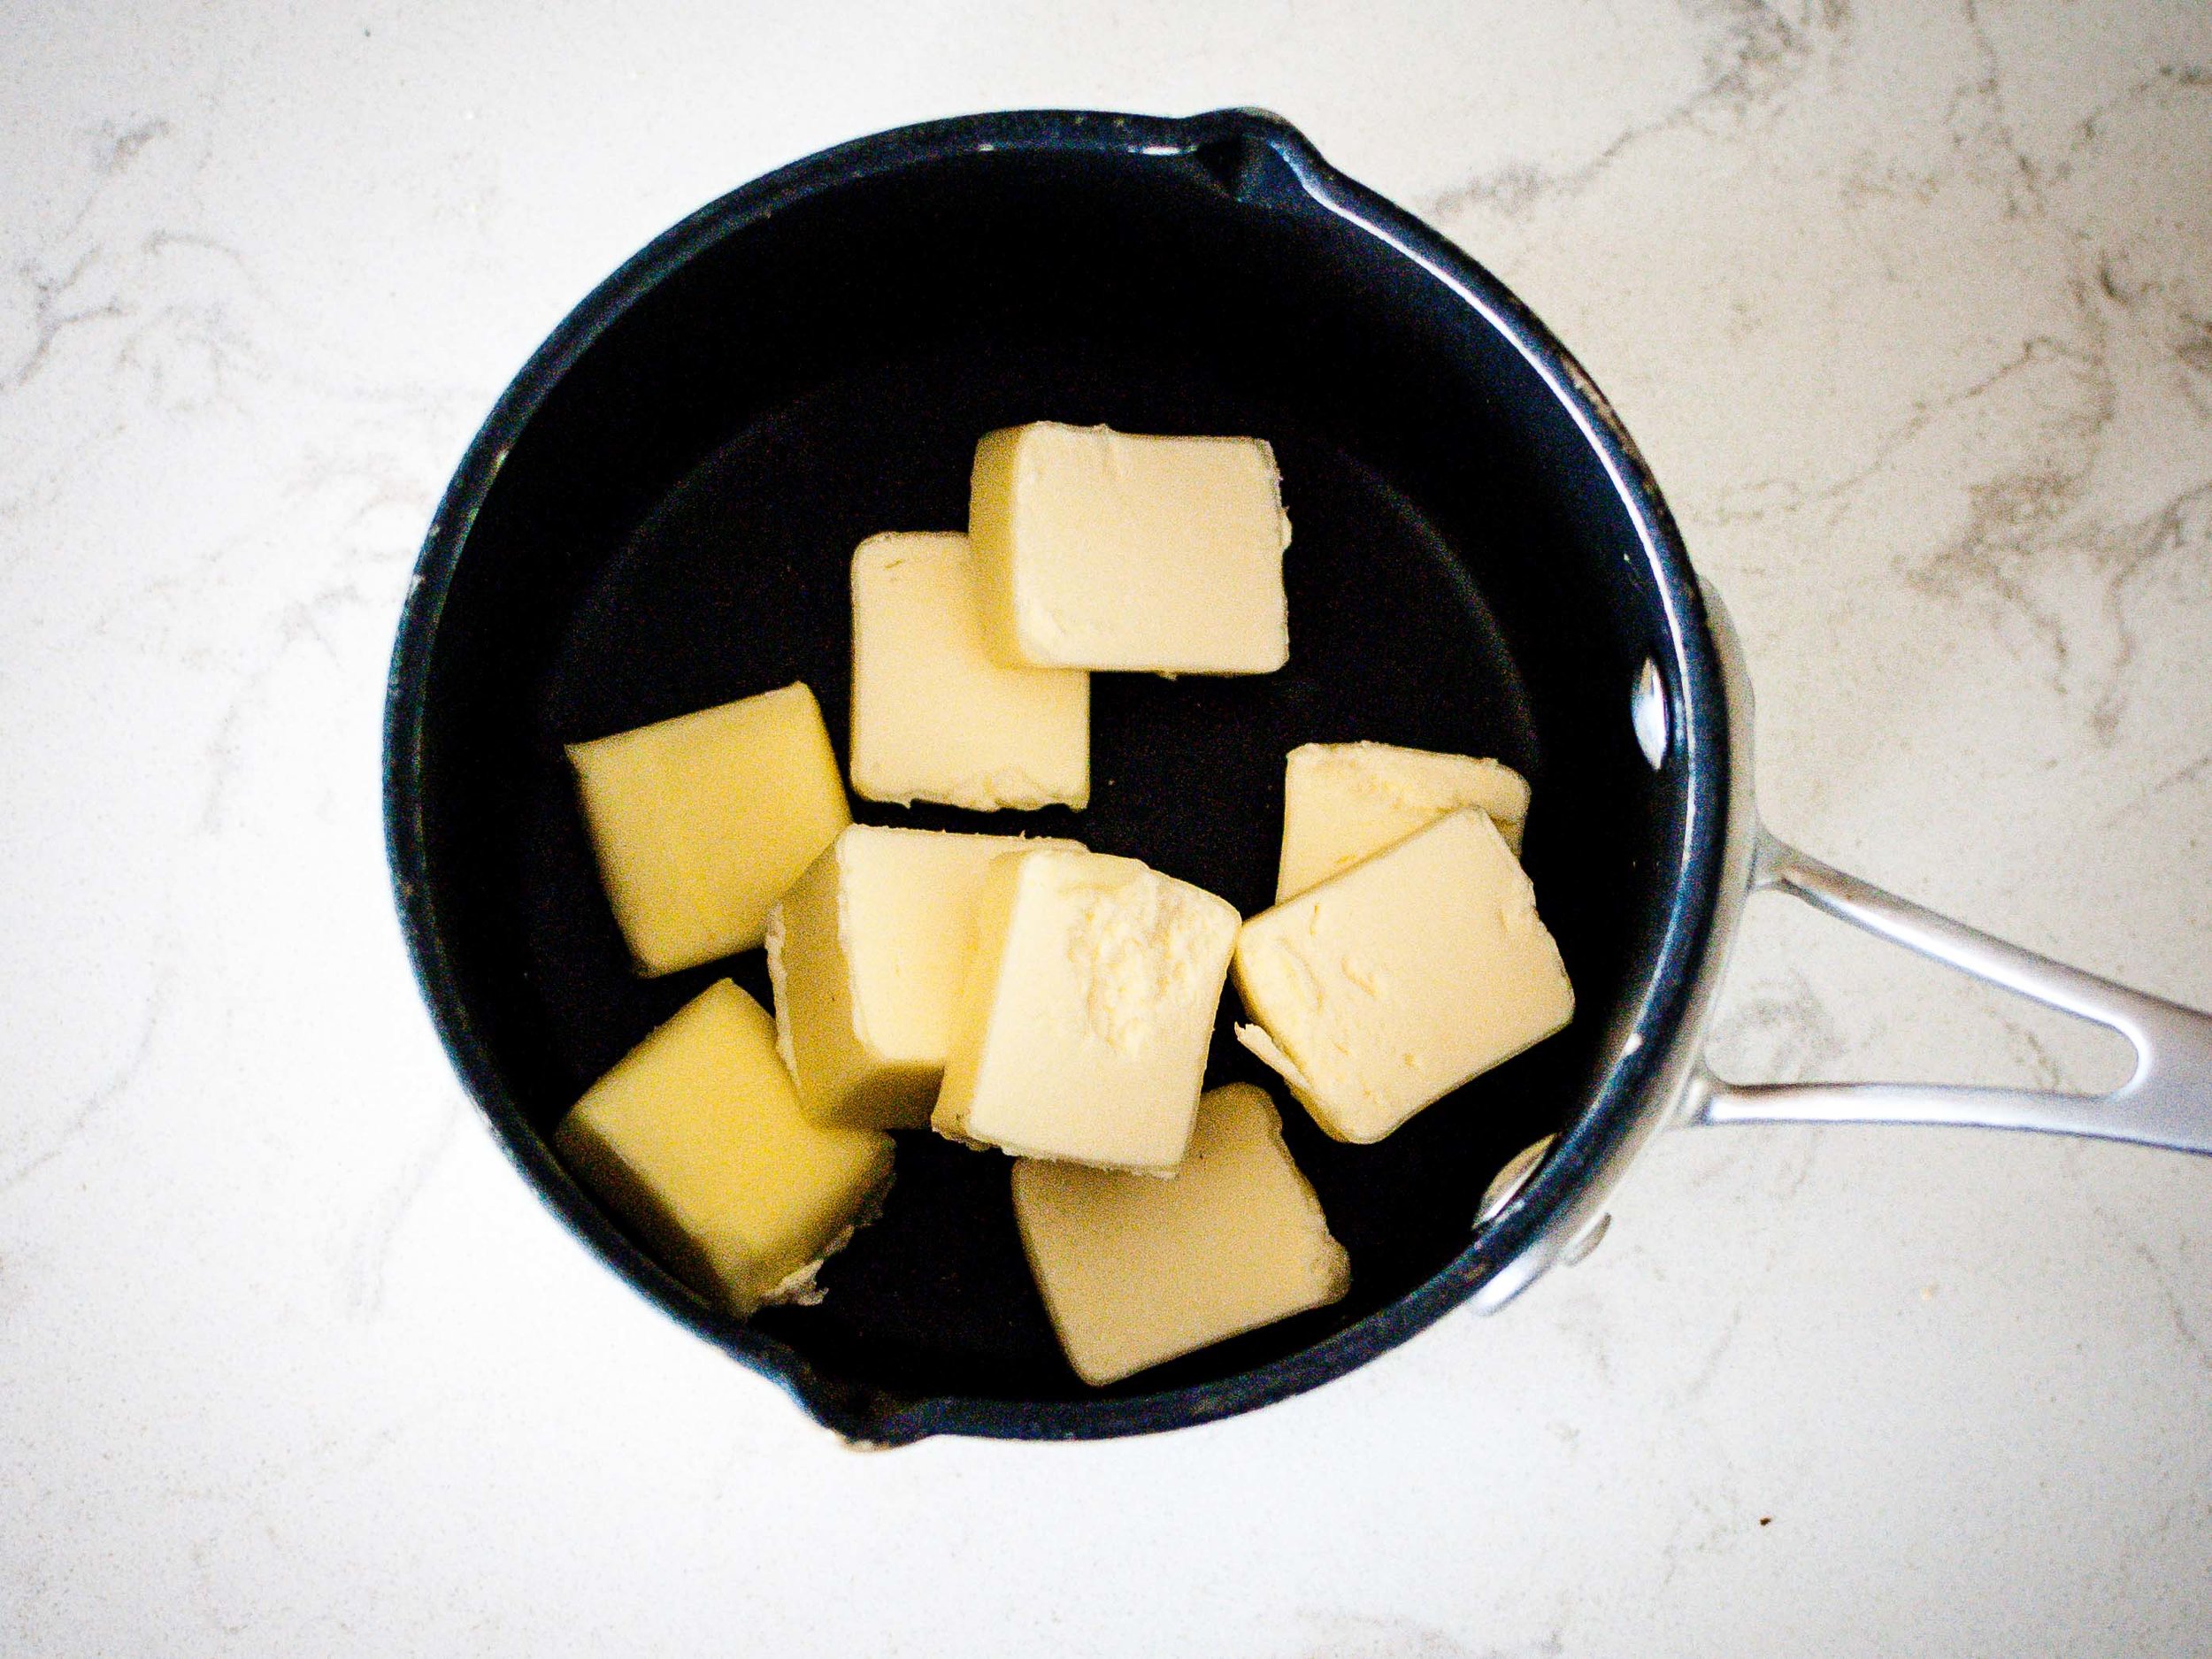
Melt the butter over medium heat in a small saucepan, swirling butter occasionally until butter smells toasty and is golden brown. (Watch closely, because it will go from browned to burnt quickly!) Transfer to a medium bowl to cool.

In a large bowl, whisk together all-purpose flour, whole wheat flour, brown sugar, granulated sugar, baking powder, baking soda, salt, and cinnamon.

Add mashed bananas, eggs, yogurt, vanilla, and bourbon to the browned butter and whisk together, until well combined.

Pour the banana mixture into the flour mixture all at once and stir together until just combined and no patches of flour remain. Batter will be thick and not pourable. Lightly fold in the toasted coconut and walnuts, then scrape the batter into prepared loaf pan. Give the pan a little jiggle and spread the batter as evenly as you can. Sprinkle the top with a un-toasted walnut pieces and coconut.

Bake for 55-65 minutes, or until a toothpick inserted into the center comes out clean. Remove from oven and let cool for 10 minutes in the pan, then remove and place on a wire rack until completely cool. (Who are we kidding? Slice into that baby and try not burn your fingers and your mouth as you devour it!)

Raspberry Peach Jam by Amy Cantu

Print Friendly and PDF

Making jam is a labor of love, but it also extends the flavors of summer into the winter. I have a soft spot in my heart for fruit jams, and love the soft, spoonable texture of this pectin-free Raspberry Peach Jam. Since there is no added commercial pectin to this jam, the texture is looser than most jams you would find in a grocery store, and the raspberry and peach flavors are bold and vivid. I think it also makes this Raspberry Peach Jam more versatile, since you could also use at as a topping for ice cream or yogurt. My favorite way to eat it is spooned generously onto a buttermilk biscuit - mornings don't get much better than that!

Notes: If you are going to bottle the jam to make it shelf stable (and more giftable), make sure to read and follow the recipe well. (Nothing worse than a spoiled jar of jam.)

I added vanilla beans to this jam to give it a more sophisticated, floral flavor, but feel free to leave it out if you don't have any.


Time: 1 1/2 hours
Yield: 6 half-pint jar

5 pounds (80 oz) Fresh peaches
24 ounces Fresh aspberries
7 cups (50 oz) granulated sugar
1/4 cup lemon juice (1-2 lemons)
1/2 teaspoon kosher salt (1/4 teaspoon table salt)
2 large vanilla beans

Bring a large pot of water to boil. Put a few metal spoons into the freezer to use for checking the set of the jam later. 

If bottling your jam, preheat oven to 250 degrees F. Wash 6 half pint mason jars with rims and new lids in hot, soapy water. Let rims and lids dry on a clean towel. Place clean jars (without lids/rims) on a rimmed cookie sheet and carefully place in oven. Heat for 30 minutes or until ready to fill with jam. 

Meanwhile, use a sharp paring knife to score the bottom of each peach with an "X". Blanch the peaches in the boiling water for 30 seconds, then remove to a bowl of cold water to cool. Skins should now easily peel off the peaches using your fingers. Remove pits and dice the peaches into 1/2-inch pieces. 

In a very large bowl, stir together diced peaches, raspberries, sugar, lemon juice, and salt until well combined. Slice vanilla beans in half length-wise, and use the tip of a small knife to scrape the black seeds into the bowl. Add the vanilla bean pods into the bowl as well, and stir until combined.

Divide fruit mixture into two large, wide saute pans (or complete this step in two batches). Bring fruit to a boil over medium heat, stirring frequently so the fruit doesn't scorch. Continue to cook jam until the large bubbles subside to smaller, finer bubbles and the jam thickens a bit. Begin checking the jam by drizzling a bit of jam onto a frozen spoon. Let the jam cool for a few seconds on the spoon, then draw a line through the jam with your fingertip. If the jam stays mostly separated, the jam is ready. If the jam quickly fills in the line, continue cooking the jam for a few more minutes and then check again.

Freezer jam: Pour jam into freezer safe containers, leaving 1/2-inch headspace. Place lids on containers and let stand at room temperature for 24 hours. Then place jam in the freezer (for up to 6 months) or refrigerator (up to 3 weeks).

Bottled jam: Place canning rack in a large canning pot, and fill halfway with water. Bring to a boil. Fill hot mason jars with jam leaving 1/4" headspace between the jam and the rim of the jar. Wipe the rims of the jar clean. Seal jars and carefully load into the canning pot, using jar lifters. Check that the water covers the jars by 1 or 2 inches, adding additional boiling water if needed. Boil the jars for 10 minutes to process. Use jar lifters to remove from the canning pot and let cool on a towel or cake rack at room temperature for 12-24 hours. Any jars that do not seal, should be stored in the refrigerator and eaten first. Sealed jars should be stored in a cool, dry place away from direct sunlight.

Easy Buttermilk Biscuits by Amy Cantu

Print Friendly and PDF

These Buttermilk Biscuits are big, fluffy, and ethereally buttery. (In fact, I baked them multiple times just to ensure that this description is accurate.) Even better, these biscuits are EASY and quick to make (under 30 minutes). There's no special equipment required - just two clean hands! The Buttermilk Biscuits are perfect split open while still hot with a little pat of butter, or amazing with this Raspberry Peach Jam. I was so excited about them, that I just slapped a thick slice of ham into a split biscuit and devoured it without a second thought.

Notes: I used a round cutter to make these buttermilk biscuits, but you could also use a clean, empty soup can or just shape the dough into a rectangle and cut into large squares. Two-inch wide biscuits are great for breakfast or tea with a bit of jam, while 3-inch wide biscuits are the ideal mate for ham and egg sandwiches.

Variations - Make them extra decadent by brushing the baked biscuits with melted butter. Add 1/2 cup shredded sharp cheddar or other hard cheese. Add chopped chives or green onions.  

The dough can also be shaped and frozen to enjoy at a later date. Bake them from frozen and add a few extra minutes to the bake time.


Time: 30 minutes
Yield: 6 large 3" biscuits or 9 medium 2" biscuits

2 1/4 cups all-purpose flour
1 tablespoon sugar
1 tablespoon baking powder
1/2 teaspoon baking soda
1 teaspoon kosher salt (or 1/2 teaspoon table salt)
1/2 cup (1 stick) very cold, unsalted butter, diced into 1/2" pieces
1 cup buttermilk

Preheat the oven to 450 degrees.

Whisk together flour, sugar, baking powder, baking soda, and salt in a large bowl. Toss very cold butter pieces into the flour. Using your fingers, squish the butter into the flour, until the flour looks like wet sand with visible flattened pieces of butter.

Pour the buttermilk into the flour mixture and stir using a fork or your fingers until a soft, sticky dough is just formed.

For round or square biscuits: Turn the dough onto a lightly floured surface. Using a rolling pin or just your hands, flatten and shape the dough into a rectangle with an even 3/4 to 1-inch thickness. Use a round cutter or cut the dough into squares, pushing the cutter straight down, without twisting. Transfer biscuits to a cookie sheet lined with parchment paper, spacing them 2 inches apart.

For drop biscuits: Use a large spoon to drop large spoonfuls of dough onto a cookie sheet lined with parchment paper, spacing them 2 inches apart.

Bake for 12-15 minutes, or until buttermilk biscuits are fluffy and tops are lightly golden brown. Serve while still warm.

Blueberry Streusel Muffins by Amy Cantu

Print Friendly and PDF

Blueberry Streusel Muffins are the kind of breakfast I have when I've been eating spinach and egg white scrambles one too many days in a row. (I know some of you are super healthy and don't see a problem with that, and all I can say is that I deeply envy you, and please don't judge me!) The texture of these blueberry muffins is endlessly moist (thank you yogurt), bursting with juicy fruit, and reminds me of cake, thanks to it's delicate, airy crumb. Really, anything cake-like that I can eat for breakfast is instantly my most favorite thing in the whole entire world. (Never mind that I have a long list of "my most favorite" foods.) The streusel is the sweet, crunchy crowning glory of these blueberry muffins, and while you could certainly skip it in the name of health, I would argue that these are not the muffins one chooses for cutting calories. Indulge! Enjoy! Go back to spinach and egg white scrambles tomorrow!

Notes: For once, I don't have a ton of notes. These Blueberry Streusel Muffins are moist and delicious, and sure, you could sub whole wheat flour for half of the all-purpose flour, or grapeseed oil and/or apple sauce for some or all of the butter, but that would be a totally different kind of blueberry muffin. The only optional ingredient that I list is the walnuts - the muffins are lovely if you include them in the streusel, but equally delicious without. So go nuts (or not), but these Blueberry Streusel Muffins (with a glass of Cold Brew Coffee with Mint Syrup,) will definitely perk up any morning!


Adapted from Smitten Kitchen.

Time: 35 minutes
Yield: 9 or 10 muffins

For the streusel:
3 tablespoons sugar
2 tablespoons finely chopped walnuts (optional)
1/2 teaspoon cinnamon
pinch of salt
1/3 cup all-purpose flour
3 tablespoons cold unsalted butter, cut into small pieces

For the muffins:
5 tablespoons unsalted butter, softened
1/2 cup sugar
1 large egg, at room temperature
3/4 cup plain yogurt
1 teaspoon vanilla
1/2 teaspoon cinnamon
1 1/2 cups all-purpose flour
1 1/2 teaspoons baking powder
1/4 teaspoon baking soda
1 teaspoon kosher salt (1/2 teaspoon table salt)
1 cup blueberries, fresh or frozen (do not defrost)

Preheat oven to 375 degrees F. Line a 12 cup muffin pan with paper liners or grease with butter or cooking spray.

In a medium bowl, smash together all streusel ingredients with your fingers, rubbing the butter into the flour and sugar, until well-combined and crumbly. Set aside.

In a medium bowl, whisk together flour, baking powder, baking soda, cinnamon, and salt. Set aside.

In the bowl of an electric mixer, combine butter and sugar. Beat until light and fluffy, about 5 minutes. Beat in egg until well-incorporated. Add yogurt and vanilla, beating well. Pour in the flour mixture and beat until the batter is just mixed. With a rubber spatula, fold in the blueberries. Batter will be very thick and not pourable.

Using an ice cream scoop or a large spoon, fill the muffin cups 3/4 full. Top generously with streusel. Bake for 25-30 minutes, until tops are golden and a toothpick comes out clean when inserted into the middle of a muffin. Let cool for 5 minutes before removing from pan. Delicious warm (with a pat of butter???) or cooled to room temperature.

Salted Maple-Oat Scones by Amy Cantu

Print Friendly and PDF

The first time I ever made these scones was in the year 2000, and I was still in college. I had just purchased Ina Garten's The Barefoot Contessa Cookbook on a whim because the full-page color photos called to me at the bookstore (this was before everyone bought everything on Amazon). I saw her "Maple-Oatmeal Scones" and immediately needed to bake them. Like right that moment. I had a big midterm paper due the next day, but I needed a study snack, right?! Yes. I really, really needed these scones. I had never made scones before - it was a bit daunting. I imagined hard, brown stones coming out of the oven, but the photo of the scones was so enticing, that I just had to try. They were not dry - instead, these Maple-Oat Scones were a tender, small miracle. They are at once earthy and decadent - the oats and whole-wheat flour provide extra "health", texture, and flavor; but the butter and maple syrup ensure that these scones are still an indulgent treat. The addition of coarse salt sprinkled on top balances out the sweet maple glaze. In good faith, I've tried baking other maple-oat scone recipes or sampling them at bakeries, but these are still the best ones that I've found. And for the record, they were also the perfect study snack: it helped me score a big fat "A" on that English midterm.

Notes: This recipe is an old, tried and true friend from my early days of cooking. Ina Garten's The Barefoot Contessa Cookbook was one of my early cookbook muses, with her easy-to-follow recipes, bright enthusiasm, and beautiful, large photos that convinced me that I could and needed to cook each recipe. The original recipe called for a sprinkle of raw oats on top for garnish, but I like the update of a sprinkling of coarse salt instead. The salty-sweet craze is one of my favorite food fads that I'm willing to embrace whole-heartedly, and it works perfectly with these scones!

I rarely have buttermilk just hanging out in the fridge, so I substitute with a mix of milk and vinegar. Stir 2 teaspoons of white vinegar or lemon juice into 1/2 cup of milk (or 1 tablespoon vinegar and 1 cup milk) and let sit for a minute or two, until slightly thickened. Voila - "buttermilk" for use in baked goods and pancakes!

Lastly, this recipe makes a lot of scones. Ina's original recipe suggest 14 (very) large scones, but I find that it makes more like 20 medium scones. I have adjusted the baking time for the smaller size, but if you want to make mini scones, reduce the baking time by a few minutes, or if making the large size, add a few minutes. The fully baked scones (without the glaze) can be cooled to room temperature and frozen. Reheat frozen scones in a 350 degree Fahrenheit oven for 8-10 minutes (mini scones may only need 5-8 minutes). Unbaked scones can also be frozen - place on a baking sheet and freeze until solid (about 1 hour). Transfer to an airtight container to store in the freezer. To bake, pop as many frozen scones as needed onto a baking sheet and add an extra 5 minutes or so to the baking time. Don't forget to glaze them after they come out of the oven!


Read More: The Shared Scones


Time: 1 hour
Yield: About 20 scones

For the Scones:
3 1/2 cups all-purpose flour
1 cup whole-wheat flour
1 cup quick-cooking oats
2 tablespoons baking powder
2 tablespoons granulated sugar
2 teaspoons salt
1 pound cold unsalted butter, diced
1/2 cup cold buttermilk
1/2 cup pure maple syrup (preferably grade B)
4 eggs, lightly beaten
1 egg beaten with 1 tablespoon milk or water, for egg wash
Maple Glaze (see recipe below)
Coarse salt for sprinkling on top (such as Fleur de Sel, Sel Gris, or Coarse Sea Salt)

Preheat the oven to 400 degrees F.

In the bowl of an electric mixer fitted with a paddle attachment, combine the flours, oats, baking powder, sugar and salt.

Blend the cold butter in at the lowest speed and mix until the butter is in pea-size pieces.

Combine the buttermilk, maple syrup and eggs and add quickly to the flour-and-butter mixture. Mix until just blended. The dough will be sticky.

Dump the dough out onto a well-floured surface and be sure it is combined. Flour your hands and a rolling pin and roll the dough 3/4 to 1 inch thick. You should see lumps of butter in the dough.

Cut into 3-inch rounds with a plain or fluted cutter and place on a baking sheet lined with parchment paper.

Brush the tops with egg wash. Bake for 15 to 20 minutes, until the tops are crisp and the insides are done.

When the scones are done, cool for 5 minutes and drizzle each scone with 1 tablespoon of the Maple Glaze (recipe below). Sprinkle a bit of coarse salt on the top, for garnish. The warmer the scones are when you glaze them, the thinner the glaze will be.

Maple Glaze

1 1/4 cups confectioners' sugar
1/2 cup pure maple syrup (preferably grade B)
1 teaspoon pure vanilla extract

To make the glaze, combine the confectioners' sugar, maple syrup and vanilla. 

Rosemary-Cheddar Scones by Amy Cantu

Print Friendly and PDF

Scones seem like a special treat in a way that muffins seem ordinary. Don't get me wrong, I will never turn down a good muffin, but a scone is a bakery good that I eat slowly and savor with a big mug of coffee or tea. (I can't be bothered with those dainty tea cups at home.) These Rosemary-Cheddar Scones are stuffed with little cubes of cheddar cheese that ooze out when baked to form lacy, crunchy bits of crispy cheese around the scone. This might be my favorite part. It's like the bit of crunchy cheese that's left at the bottom of a fondue pot, or the cheese that escapes a grilled cheese sandwich onto the griddle. The Rosemary-Cheddar Scone itself is moist and tender, flecked with bits of fragrant rosemary, and happily cheesy. (Please don't compare these to the dry hockey puck scones that seem to be everywhere. Those scones are an abomination and should be banned from being sold.) Getting me up in the morning is like waking a sleeping monster, but this monster absolutely will get up early to bake these scones, because the results are so worth it!

Notes: This recipe is an old, tried and true friend from my early days of cooking. Ina Garten's The Barefoot Contessa Cookbook was one of my early cookbook muses, with her easy-to-follow recipes, bright enthusiasm, and beautiful, large photos that convinced me that I could and needed to cook each recipe. The original recipe called for dill, but I have substituted any fresh herb that I have hiding in the fridge - rosemary, chives, thyme, tarragon, etc. are all delicious. I happen to have an enormous rosemary bush in the backyard, so it's a convenient choice for me! Other delicious add-ins could be bacon bits, peeled and diced apple, jalapeño pepper, sun-dried tomatoes, or corn. You can also vary the type of cheese - brie, gruyere, mozzarella, jack . . . the possibilities are endless.

Lastly, this recipe makes a lot of scones. Ina's original recipe suggest 16 (very) large scones, but I find that it makes more like 24 medium scones. I have adjusted the baking time for the smaller size, but if you want to make mini scones, reduce the baking time by a few minutes, or if making the large size, add a few minutes. The fully baked scones can be fully cooled and frozen. Reheat frozen scones in a 350 degree Fahrenheit oven for 8-10 minutes (mini scones may only need 5-8 minutes). Unbaked scones can also be frozen - place on a baking sheet and freeze until solid (about 1 hour). Transfer to an airtight container to store in freezer. To bake, pop as many frozen scones as needed onto a baking sheet and add an extra 5 minutes or so to the baking time.


Read More: The Shared Scones


Time: 45 minutes
Yield: About 24 scones
 
4 cups plus 1 tablespoon all-purpose flour, divided
2 tablespoons baking powder
2 teaspoons salt
3/4 pound cold unsalted butter, diced
4 eggs, beaten lightly
1 cup cold heavy cream
1/2 pound extra-sharp yellow Cheddar, small-diced
1/3 cup minced fresh rosemary leaves
1 egg beaten with 1 tablespoon water or milk, for egg wash

Preheat the oven to 400 degrees F.

Combine 4 cups of flour, the baking powder, and salt in the bowl of an electric mixer fitted with a paddle attachment. 

Add the butter and mix on low speed until the butter is in pea-sized pieces. Mix the eggs and heavy cream and quickly add them to the flour-and-butter mixture. Combine until just blended.

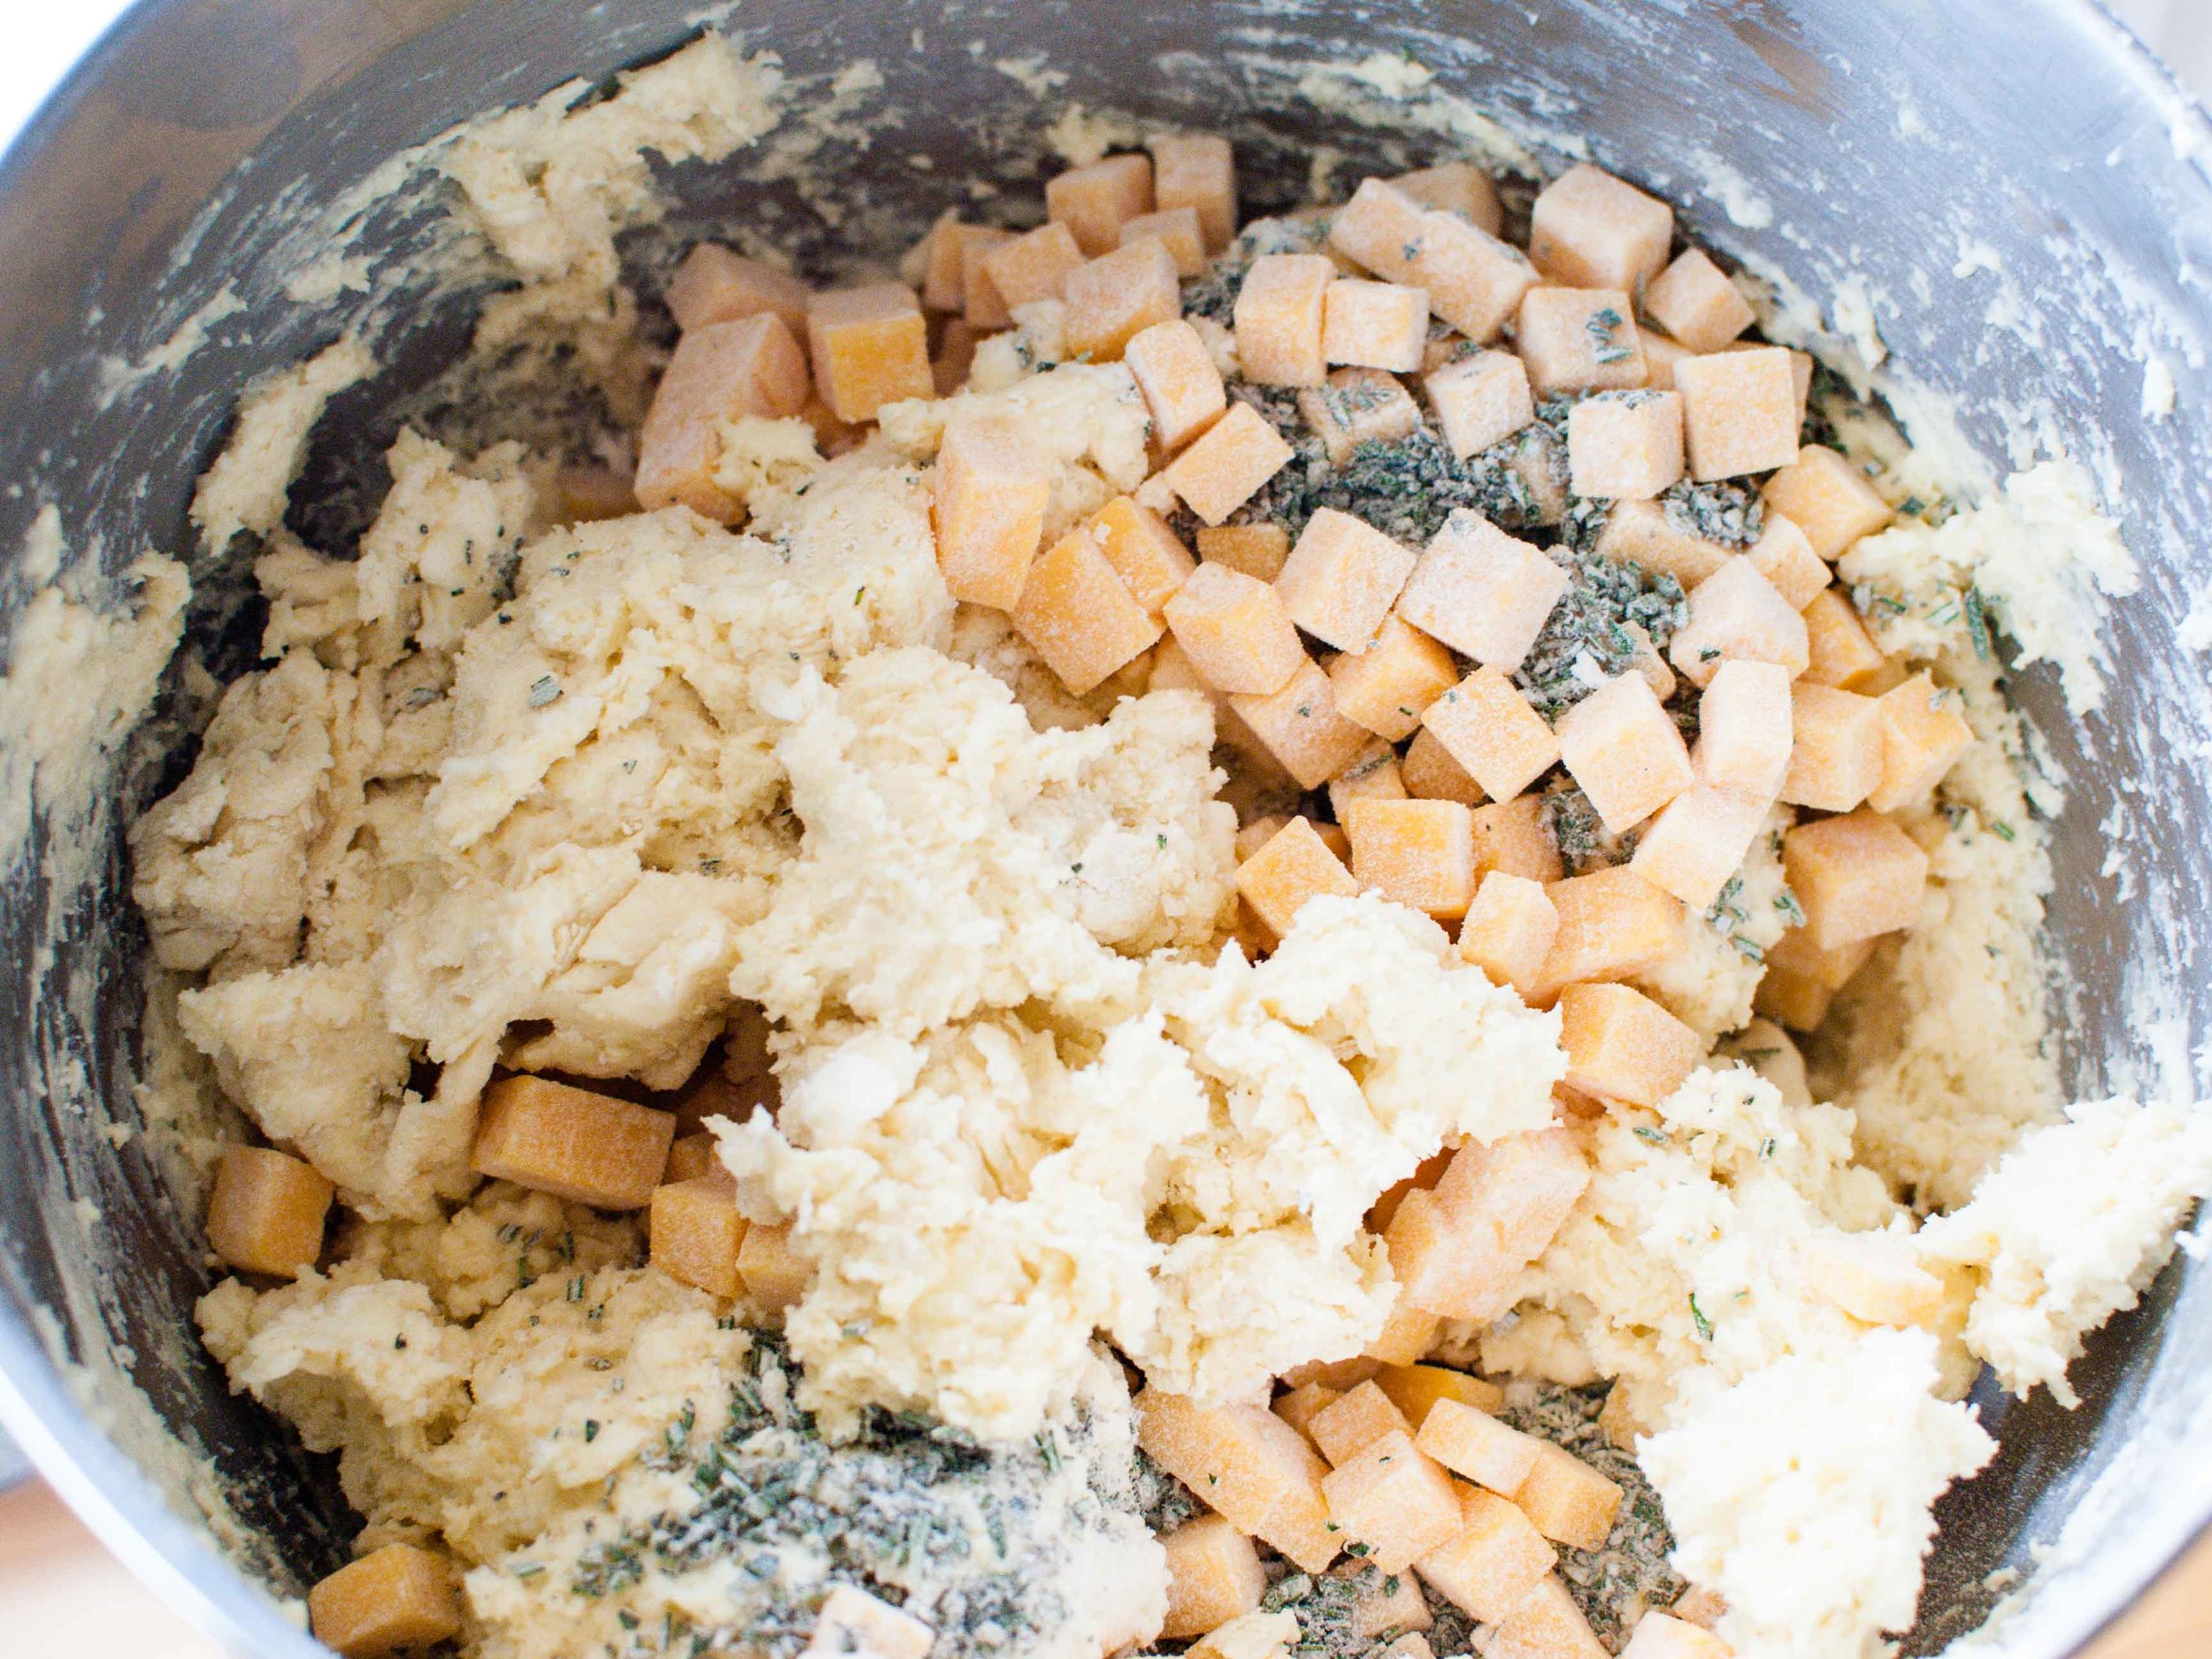
Toss together the Cheddar, rosemary, and 1 tablespoon of flour and add them to the dough. Mix until they are almost incorporated.

Dump the dough onto a well-floured surface and knead it for 1 minute, until the Cheddar and rosemary are well distributed.

Roll the dough 3/4-inch thick. Cut into 3-inch squares and then in half diagonally to make triangles. Brush the tops with egg wash.

Bake on a baking sheet lined with parchment paper for 15 to 20 minutes, until the outside is crusty and golden, and the inside is fully baked.

Buttery Soft Pretzels by Amy Cantu

Print Friendly and PDF

I fell in love with the soft, chewy, buttery, salty goodness that are these pretzels, the moment I sank my teeth into them. To make these even more appealing, they can be made from start to finish in an hour. There's no fussy waiting for an hour or more begging the dough to rise or fiddly boiling them in pot of baking soda water. The process has been streamlined to get these beauties in your mouth as quickly as possible!

Notes: I would not and did not change one thing about this recipe. I do have a couple thoughts on it though. (Don't I always?) I did not have pretzel salt on hand, so I used a very light sprinkling of Fleur de Sel. Coarse sea salt or any other larger crystal finishing salt would work great.

Fun variations - Sprinkle these with cinnamon sugar after brushing the butter onto the pretzels - oh yes! Stir together granulated sugar and finely grated orange/lemon zest, then dust over the buttered pretzels - so zesty! Or shower finely grated parmesan and dried oregano over the buttery tops - oh my!  Add a minced garlic clove to the butter before brushing over the pretzels - mmhmm! Or go the mini-route, and cut the dough into bite-sized pieces for pretzel bites - perfect party food!

These are best eaten the day they are baked and are heavenly if eaten straight from the oven. 


Recipe from King Arthur Flour.

TIme: 1 hour
Yield: 8 pretzels

Dough
2 1/2 cups Unbleached All-Purpose Flour
1 teaspoon salt
1 teaspoon sugar
2 1/4 teaspoons instant yeast
7/8 to 1 cup warm water*
*Use the greater amount in the winter, the lesser amount in the summer, and somewhere in between in the spring and fall. Your goal is a soft dough.

Topping
1 cup boiling water
2 tablespoons baking soda
coarse, kosher or pretzel salt, optional
3 tablespoons unsalted butter, melted

To make dough by hand, or with a mixer: Place all of the dough ingredients into a bowl, and beat until well-combined. Knead the dough, by hand or machine, for about 5 minutes, until it's soft, smooth, and quite slack. Flour the dough and place it in a bag, and allow it to rest for 30 minutes.

To make dough with a bread machine: Place all of the dough ingredients into the pan of your bread machine, program the machine for dough or manual, and press Start. Allow the dough to proceed through its kneading cycle (no need to let it rise), then cancel the machine, flour the dough, and give it a rest in a plastic bag, as instructed above.

To make dough with a food processor: Place the flour, salt, sugar and yeast in the work bowl of a food processor equipped with the steel blade. Process for 5 seconds. Add the water, and process for 7 to 10 seconds, until the dough starts to clear the sides of the bowl. Process a further 45 seconds. Place a handful of flour in a bowl, scoop the slack dough into the bowl, and shape the dough into a ball, coating it with the flour. Transfer the dough to a plastic bag, close the bag loosely, leaving room for the dough to expand, and let it rest at room temperature for 30 minutes.

While the dough is resting, prepare the topping: Combine the boiling water and baking soda, stirring until the soda is totally (or almost totally) dissolved. Set the mixture aside to cool to lukewarm (or cooler).

Preheat your oven to 475°F. Prepare a baking sheet by spraying it with vegetable oil spray, or lining it with parchment paper. Transfer the dough to a lightly greased work surface, and divide it into eight equal pieces (about 70g, or 2 1/2 ounces, each). Allow the pieces to rest, uncovered, for 5 minutes. Pour the baking soda/water into a 9" square pan.

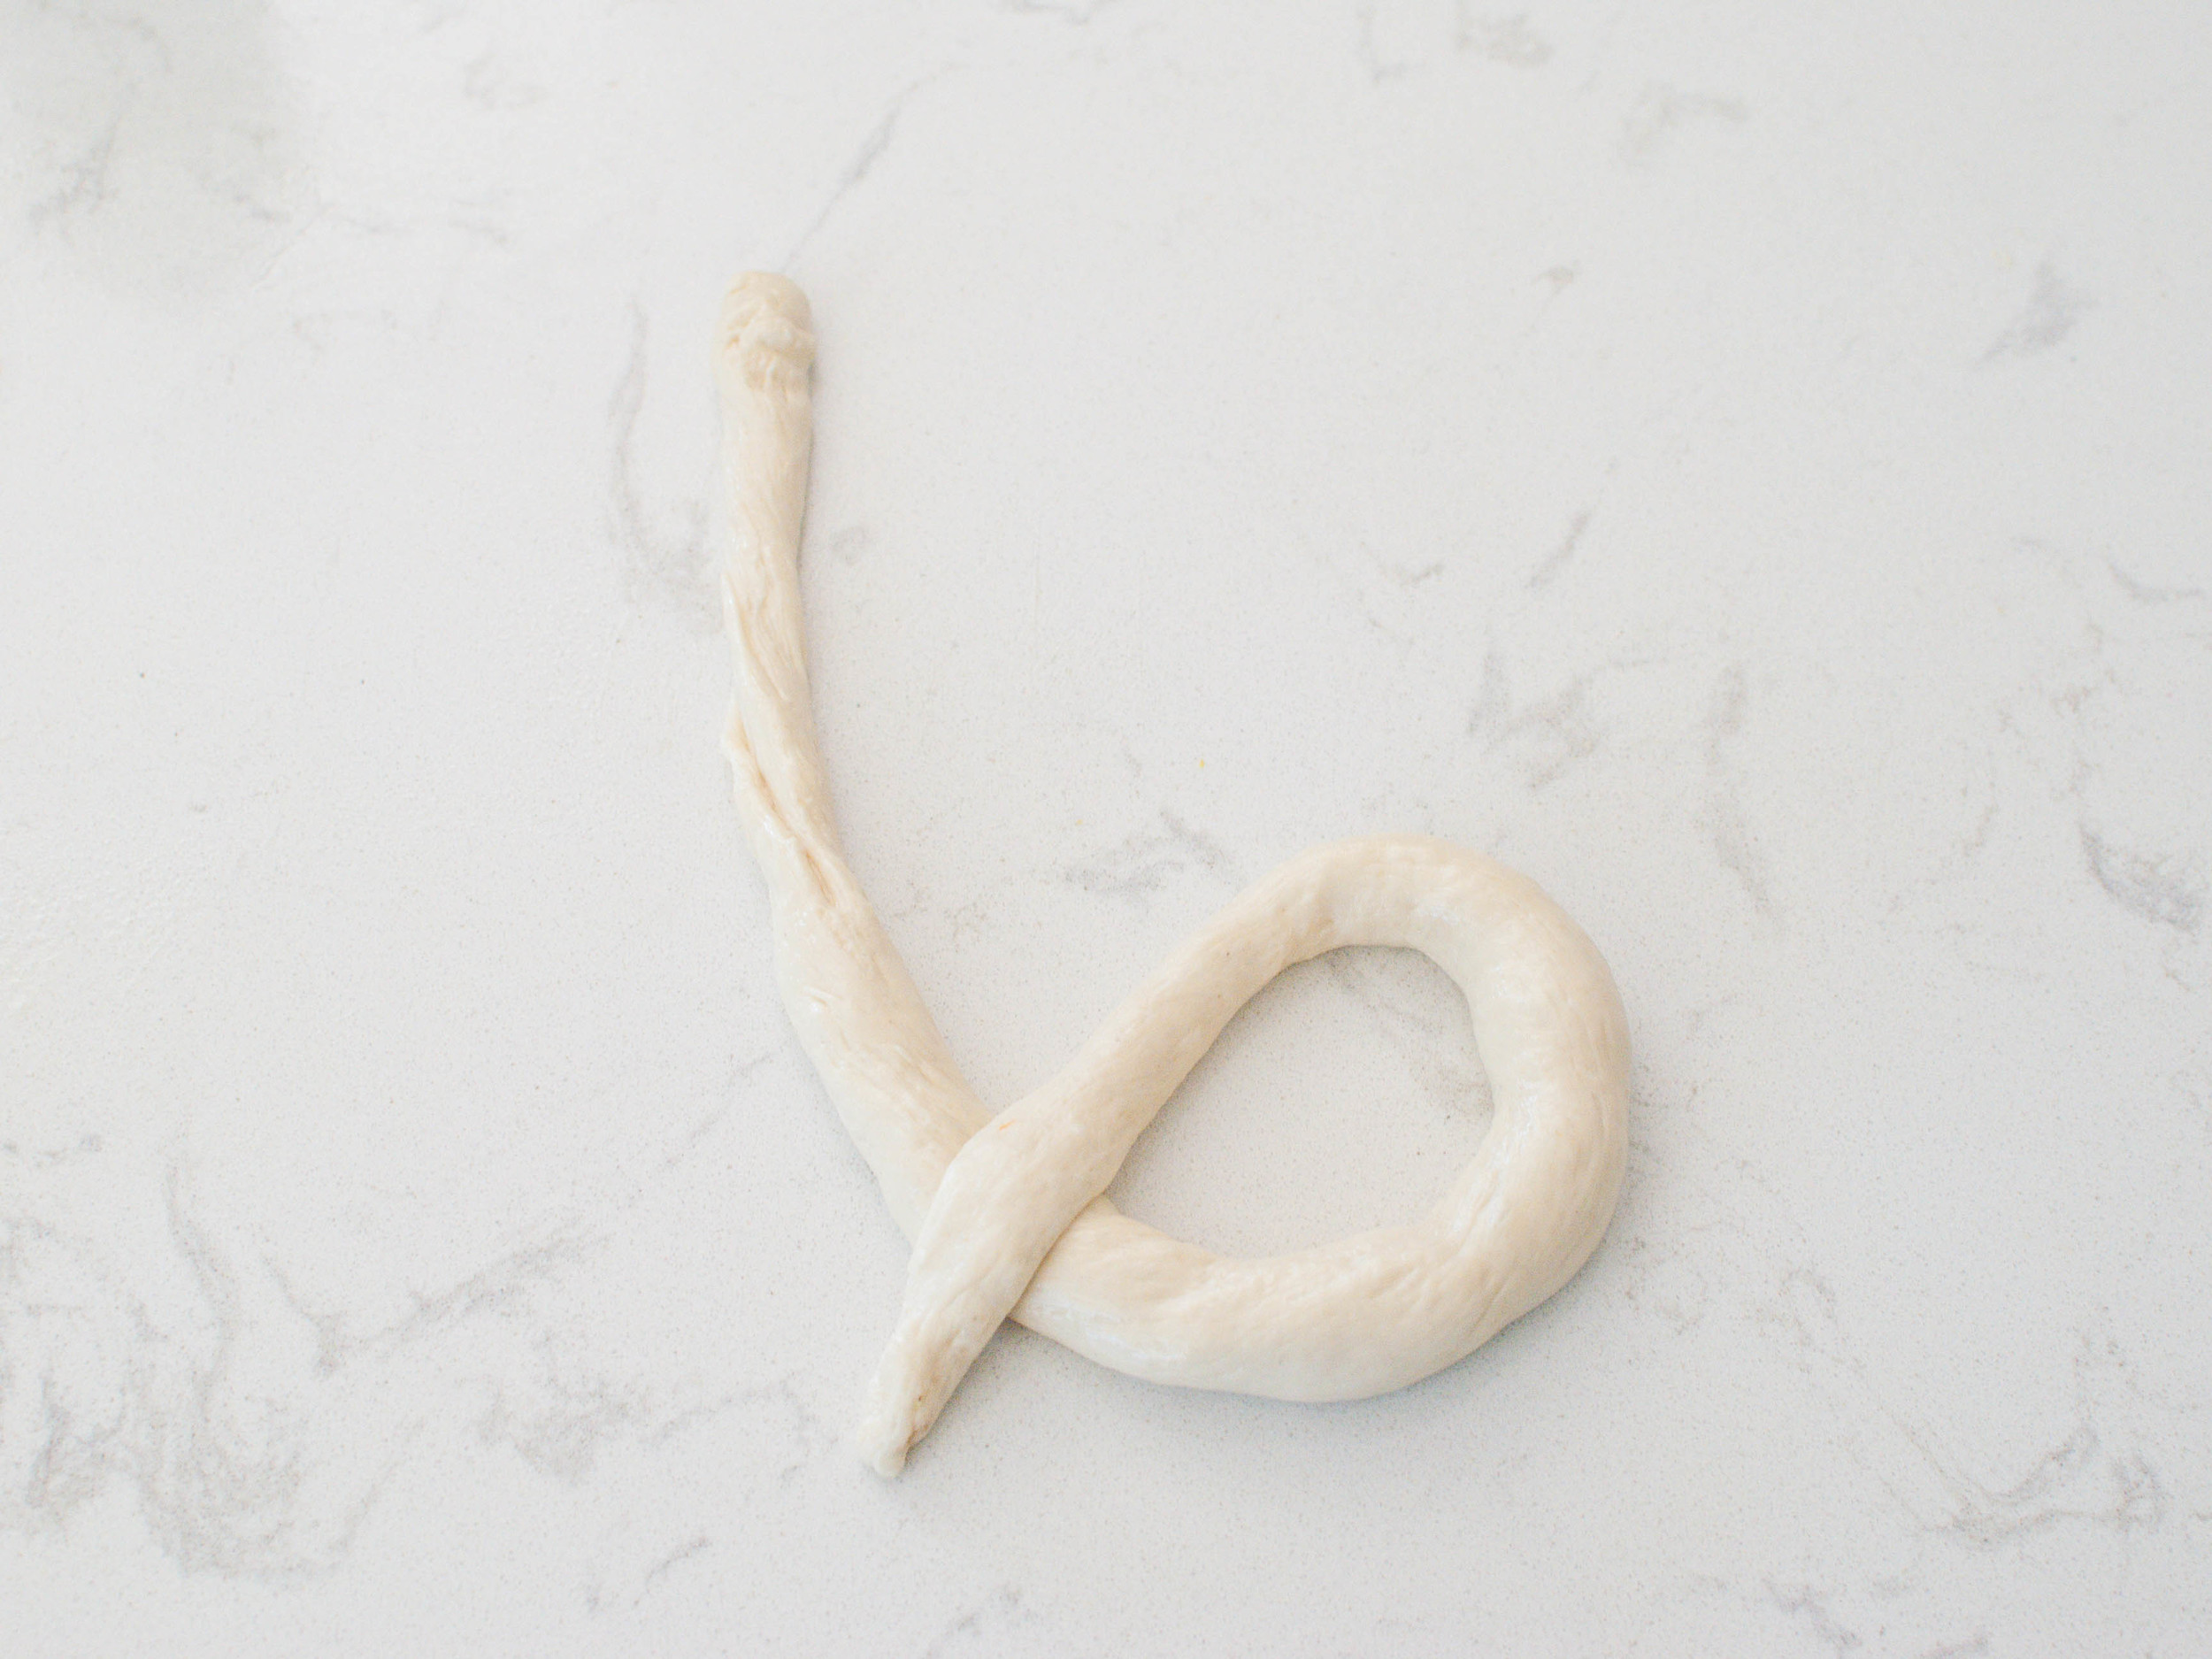
Roll each piece of dough into a long, thin rope (about 28" to 30" long), and twist each rope into a pretzel. Working with 4 pretzels at a time, place them in the pan with the baking soda/water, spooning the water over their tops; leave them in the water for 2 minutes before placing them on the baking sheet. This baking soda "bath" will give the pretzels a nice, golden-brown color.

Transfer the pretzels to the prepared baking sheet. Sprinkle them lightly with coarse, kosher, or pretzel salt, if desired. Allow them to rest, uncovered, for 10 minutes.

Bake the pretzels for 8 to 9 minutes, or until they're a dark golden brown. (If your oven runs hot or you are using a convection oven, start checking at 6 minutes.) Remove the pretzels from the oven, and brush them thoroughly with the melted butter. Keep brushing the butter on until you've used it all up; it may seem like a lot, but that's what gives these pretzels their ethereal taste. Eat the pretzels warm, or reheat them in an oven or microwave.

Olive Oil Granola by Amy Cantu

Print Friendly and PDF

Olive Oil Granola is addictive. There. I've given you fair warning. It's at once rich, sweet, salty, crunchy, and vaguely bitter from the olive oil. Sprinkle this over homemade yogurt, and the added tanginess has now put your tastebuds on full alert. It's all I wanted to eat for a week. (Yes, I know: I just got over my Coconut Tres Leches Cake for breakfast obsession and eating Broccoli Cooked Forever on everything before that. Clearly, I have issues . . . ) I'd love to take credit for this miracle granola, but the internet has well-documented the Olive Oil Granola phenomenon here and here and here. Mine is yet another adaptation, but really, it's impossible to have too many. It's that good.

Notes: This granola is on the sweet side, so you could certainly reduce or omit the brown sugar. I love it as written, especially with plain yogurt. 


Read More: The Shared Brunch


Time: 1 hour
Yield: 10 cups

4 cups old-fashioned rolled oats
1 cup hulled raw pumpkin seeds
1 cup hulled raw sunflower seeds
1 cup unsweetened coconut chips
1 cup raw cashews, left whole or coarsely chopped
1 cup raw walnuts
1 cup pure maple syrup (preferably Grade B)
3/4 cup extra-virgin olive oil
1/2 cup packed light-brown sugar
1 1/2 teaspoons kosher salt
1 cup dates, pits removed, coarsely chopped

Heat oven to 300 degrees Fahrenheit. Line two rimmed sheet pans with parchment paper.

Combine first 10 ingredients (everything except the dates) in a large bowl, stirring well. Divide and spread mixture evenly between the two prepared pans.

Bake for 45 minutes, stirring every 10 to 15 minutes to brown evenly.

Remove from oven and stir in chopped dates. Let cool completely. Granola can be stored in an airtight container for up to one month.

Homemade Yogurt by Amy Cantu

Print Friendly and PDF

As I emptied out yet another Costco-sized container of plain yogurt, I wondered to myself if I could maybe make this at home. It turns out that homemade yogurt is surprisingly easy to make and also really economical, if you enjoy eating yogurt as much as I do! I find it to be creamier, silkier, and smoother than most commercial yogurts, but the best part is that I get to customize just how tangy I want the yogurt to taste. In this case, I went for a mildly tangy flavor (fermented for 6-7 hours), that I could enjoy with this addictive granola without the need to add any additional sweetener; it was a match made in heaven!

Notes: I like homemade yogurt made with whole milk best, but it can also be made with 2% or non-fat milk. The less fat in the milk, the runnier it will be. (There are recipes that have tricks like adding powdered milk to non-fat milk to thicken up the yogurt - I have faith in your Googling skills to find that info if you need it.) Use any brand commercial plain yogurt (that you like the taste of) as a starter - it doesn't matter if it's whole, low fat, or non-fat yogurt. You can reserve some of your first batch of yogurt to use as a starter for the next batch. After about 5 batches, you will probably need to start again with new commercial yogurt as the starter. To continue using your starter indefinitely, there are heirloom/re-usable yogurt starters that you can purchase.

I used a cooler to incubate my yogurt, but any warm place will do. Examples include an oven with the light turned on and covering the jars with a thick towel in a sunny window.

To make Greek-style yogurt, set a double-layer of cheesecloth in a colander, and put the colander in a bowl. Pour the finished yogurt into the colander, and let strain in the refrigerator until it's the thickness you desire (2-4 hours).

The recipe below uses mason jars to ferment and store the yogurt. If you don't need the pot you are using to heat the yogurt for anything else, you could also just use that same pot to ferment the yogurt. Just put a lid on the pot after stirring in the yogurt starter, and put in a warm spot, as directed.


Read More: The Shared Brunch


Time: 20 minutes, not including time for yogurt to ferment
Yield: About 14 cups

1 gallon milk (preferably whole or 2%)
1/2 cup heavy cream (optional)
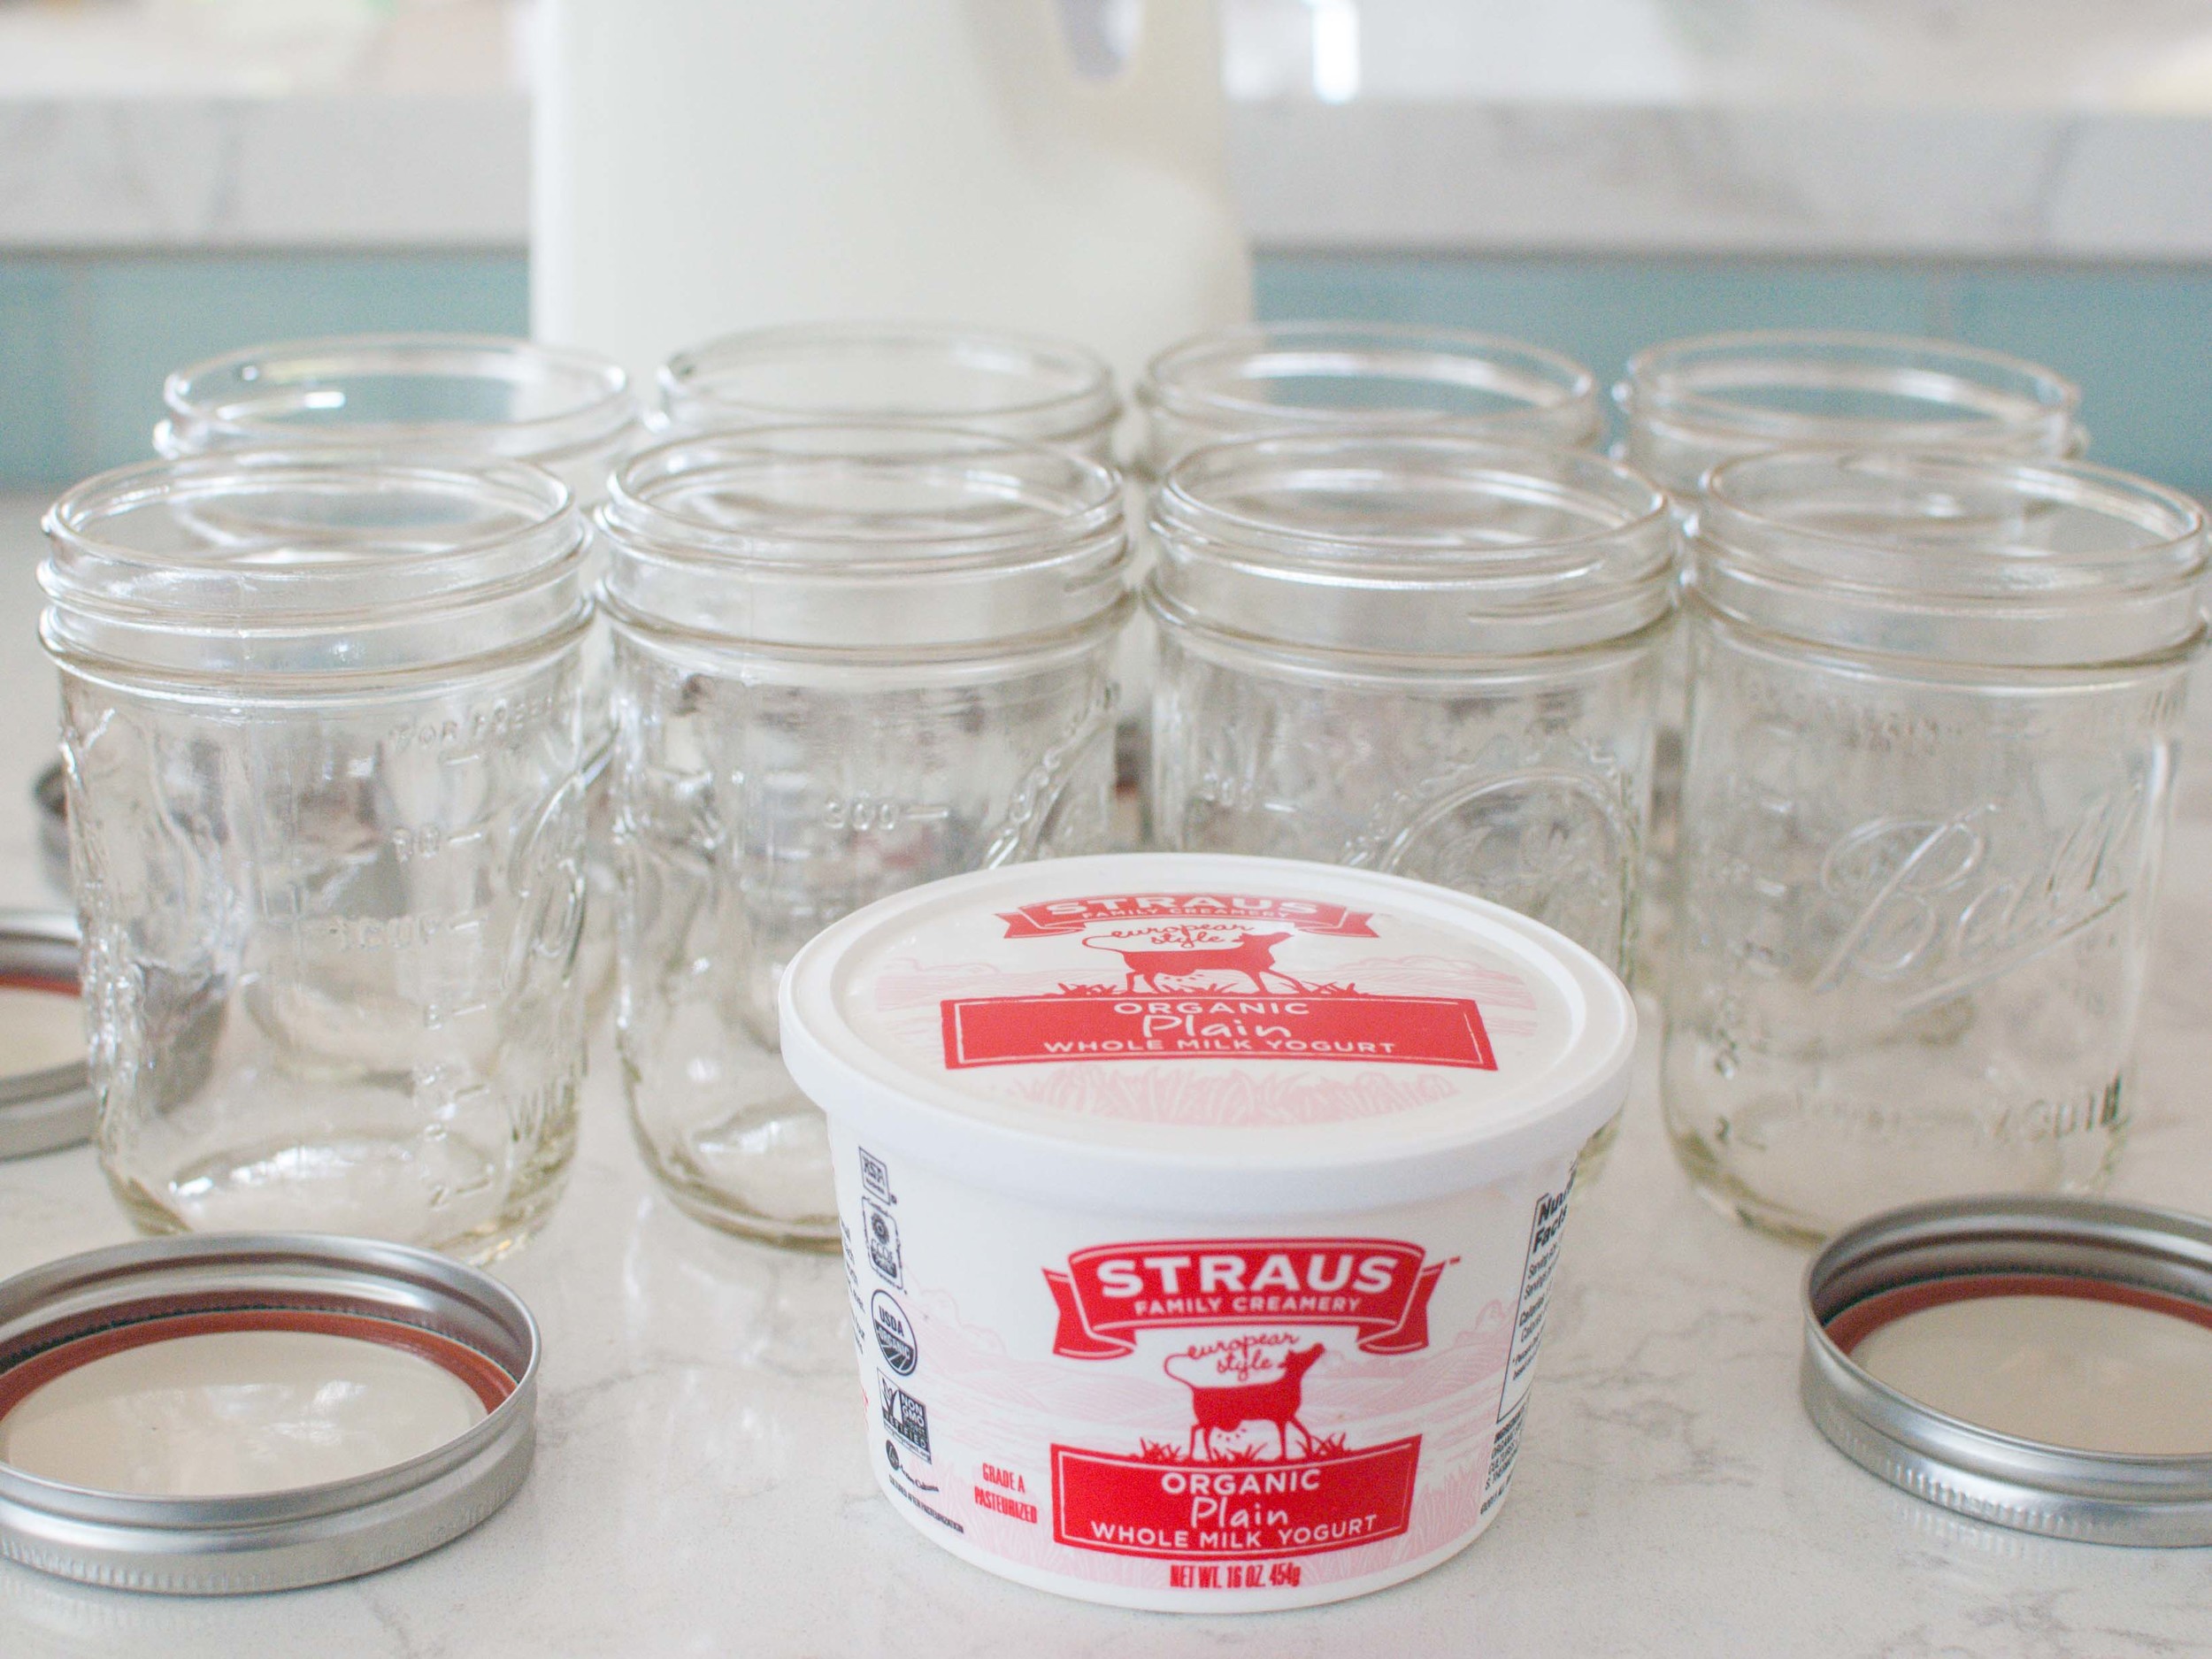
2/3 cup commercial plain yogurt with active live, cultures (I used Strauss brand.)

Sterilize four quart-size (or six pint-size) mason jars by filling them with boiling water, and let sit for 5 minutes. Then pour the water out and let the jars dry. (The jars will be very hot from the boiling water!) You can also just ferment the yogurt in the pot that you use to warm the milk.

Rinse the inside of a large pot with cold water (do not dry). Pour milk (and cream, if using) into the hot and heat over medium-high heat to 190 degrees F. You will see small bubbles/foam forming on the surface of the milk. Remove pot from heat, and let cool to about 115 degrees F. (To speed up the cooling process, set the pot in a sink filled with ice water. Stir occasionally to evenly cool the milk.) Whisk commercial plain yogurt with 1/2 cup of the cooled milk in a small bowl. Pour this mixture back into the pot and stir well.

Pour the cooled milk mixture into the sterilized jars. (You will have a little extra yogurt leftover, after you fill the jars with yogurt.) Set jars in a warm area to sit undisturbed for 6-12 hours. (I put mine in a cooler filled with about an inch of very warm tap water.) Six hours yields a mildly tart yogurt, while 12 hours will be very tart.

Chill the yogurt in the refrigerator for at least 4 hours. The yogurt will thicken as it cools.

Oatmeal Fruit-Nut Bars by Amy Cantu

Print Friendly and PDF

Notes: These oatmeal fruit-nut bars are essentially a bowl of oatmeal in a bar form. In other words, they are not really like granola bars. The are soft, not too chewy, and taste like my favorite bowl of nutritious oatmeal, loaded up with dried fruit, seeds or nuts, and touch of maple syrup. Store cooled and cut bars in the refrigerator for up to 5 days or freeze in a sealed container for up to 4 months. Defrost frozen bars in the refrigerator for 24-48 hours.


Adapted from Catherine McCord's Weelicious.

Time: 35 minutes
Yield: 18 squares

2 cups old fashioned oats
1 cup whole wheat flour
1 1/2 teaspoon cinnamon
1/2 teaspoon kosher salt (or 1/4 teaspoon table salt)
1 teaspoon baking powder
1 1/2 cup milk (any kind of milk — rice, almond, soy, cow’s — will work)
3 tablespoons maple syrup
1/2 cup applesauce
1 large egg
1 teaspoon vanilla
3/4 cup dried fruit (I used cranberries, raisins, and cherries)
1/2 cup chopped nuts or seeds (I used sunflower seeds and pepitas)

Preheat oven to 375 degrees. Grease a 7 x 11 inch baking dish.

Place the first 5 dry ingredients in a bowl and stir to combine. Mix the milk, applesauce, egg, maple syrup, and vanilla in a separate bowl. Pour the dry ingredients into the wet mixture, stir to combine and then stir in the dried fruits and nuts. Pour the oatmeal mixture into prepared baking dish. 

Bake for 30 minutes or until thickened and golden. Cool, cut into squares and serve.

Hot Cross Buns by Amy Cantu

Print Friendly and PDF

Notes: You can start these buns the day before a couple different ways. The first way - make the dough and then let rise overnight in the fridge for the first rise. Bring the dough to room temperature, and continue with the recipe by punching down the dough and shaping into the small rolls. The second way - follow the recipe through shaping the dough into small rolls. Cover with plastic wrap, and leave in the fridge overnight for the second rise. Bring the rolls to room temperature, and if they are not double the original size, let rise until they are. Continue with the recipe as written.


Loosely adapted from Nigella Lawson's cookbook, Feast.

Time: 1 hour active time, 2 1/2 hours inactive time
Yield: 12 buns

For the dough:
2/3 cup milk, plus extra as needed
1/4 cup unsalted butter
zest of 2 clementines or 1 small orange
1 clove
1 vanilla bean
3 cups bread flour
2 1/4 teaspoon (1/4 ounce) instant yeast
3/4 cup mixed dried fruit (I used dried tart cherries, cranberries, and raisins)
1 teaspoon ground cinnamon
1/2 teaspoon ground ginger
1/2 teaspoon ground nutmeg
1/4 teaspoon ground cardamom
1 egg, at room temperature

For the egg wash:
1 egg, beaten with a little milk

For the crosses on the buns:
3 tablespoons all-purpose flour
1 1/2 teaspoons granulated sugar
2-3 tablespoons water

For the glaze:
runny honey, for brushing

Split the vanilla bean in half length-wise using a small, sharp knife. Scrape the seeds out of the vanilla bean pod into a small saucepan and drop the vanilla bean pod in too. Stir the milk, butter, zest, and clove into the saucepan, and heat over low heat until the butter melts. Remove from heat and let cool until mixture is just warm to the touch (about 110 to 115 degrees F). 

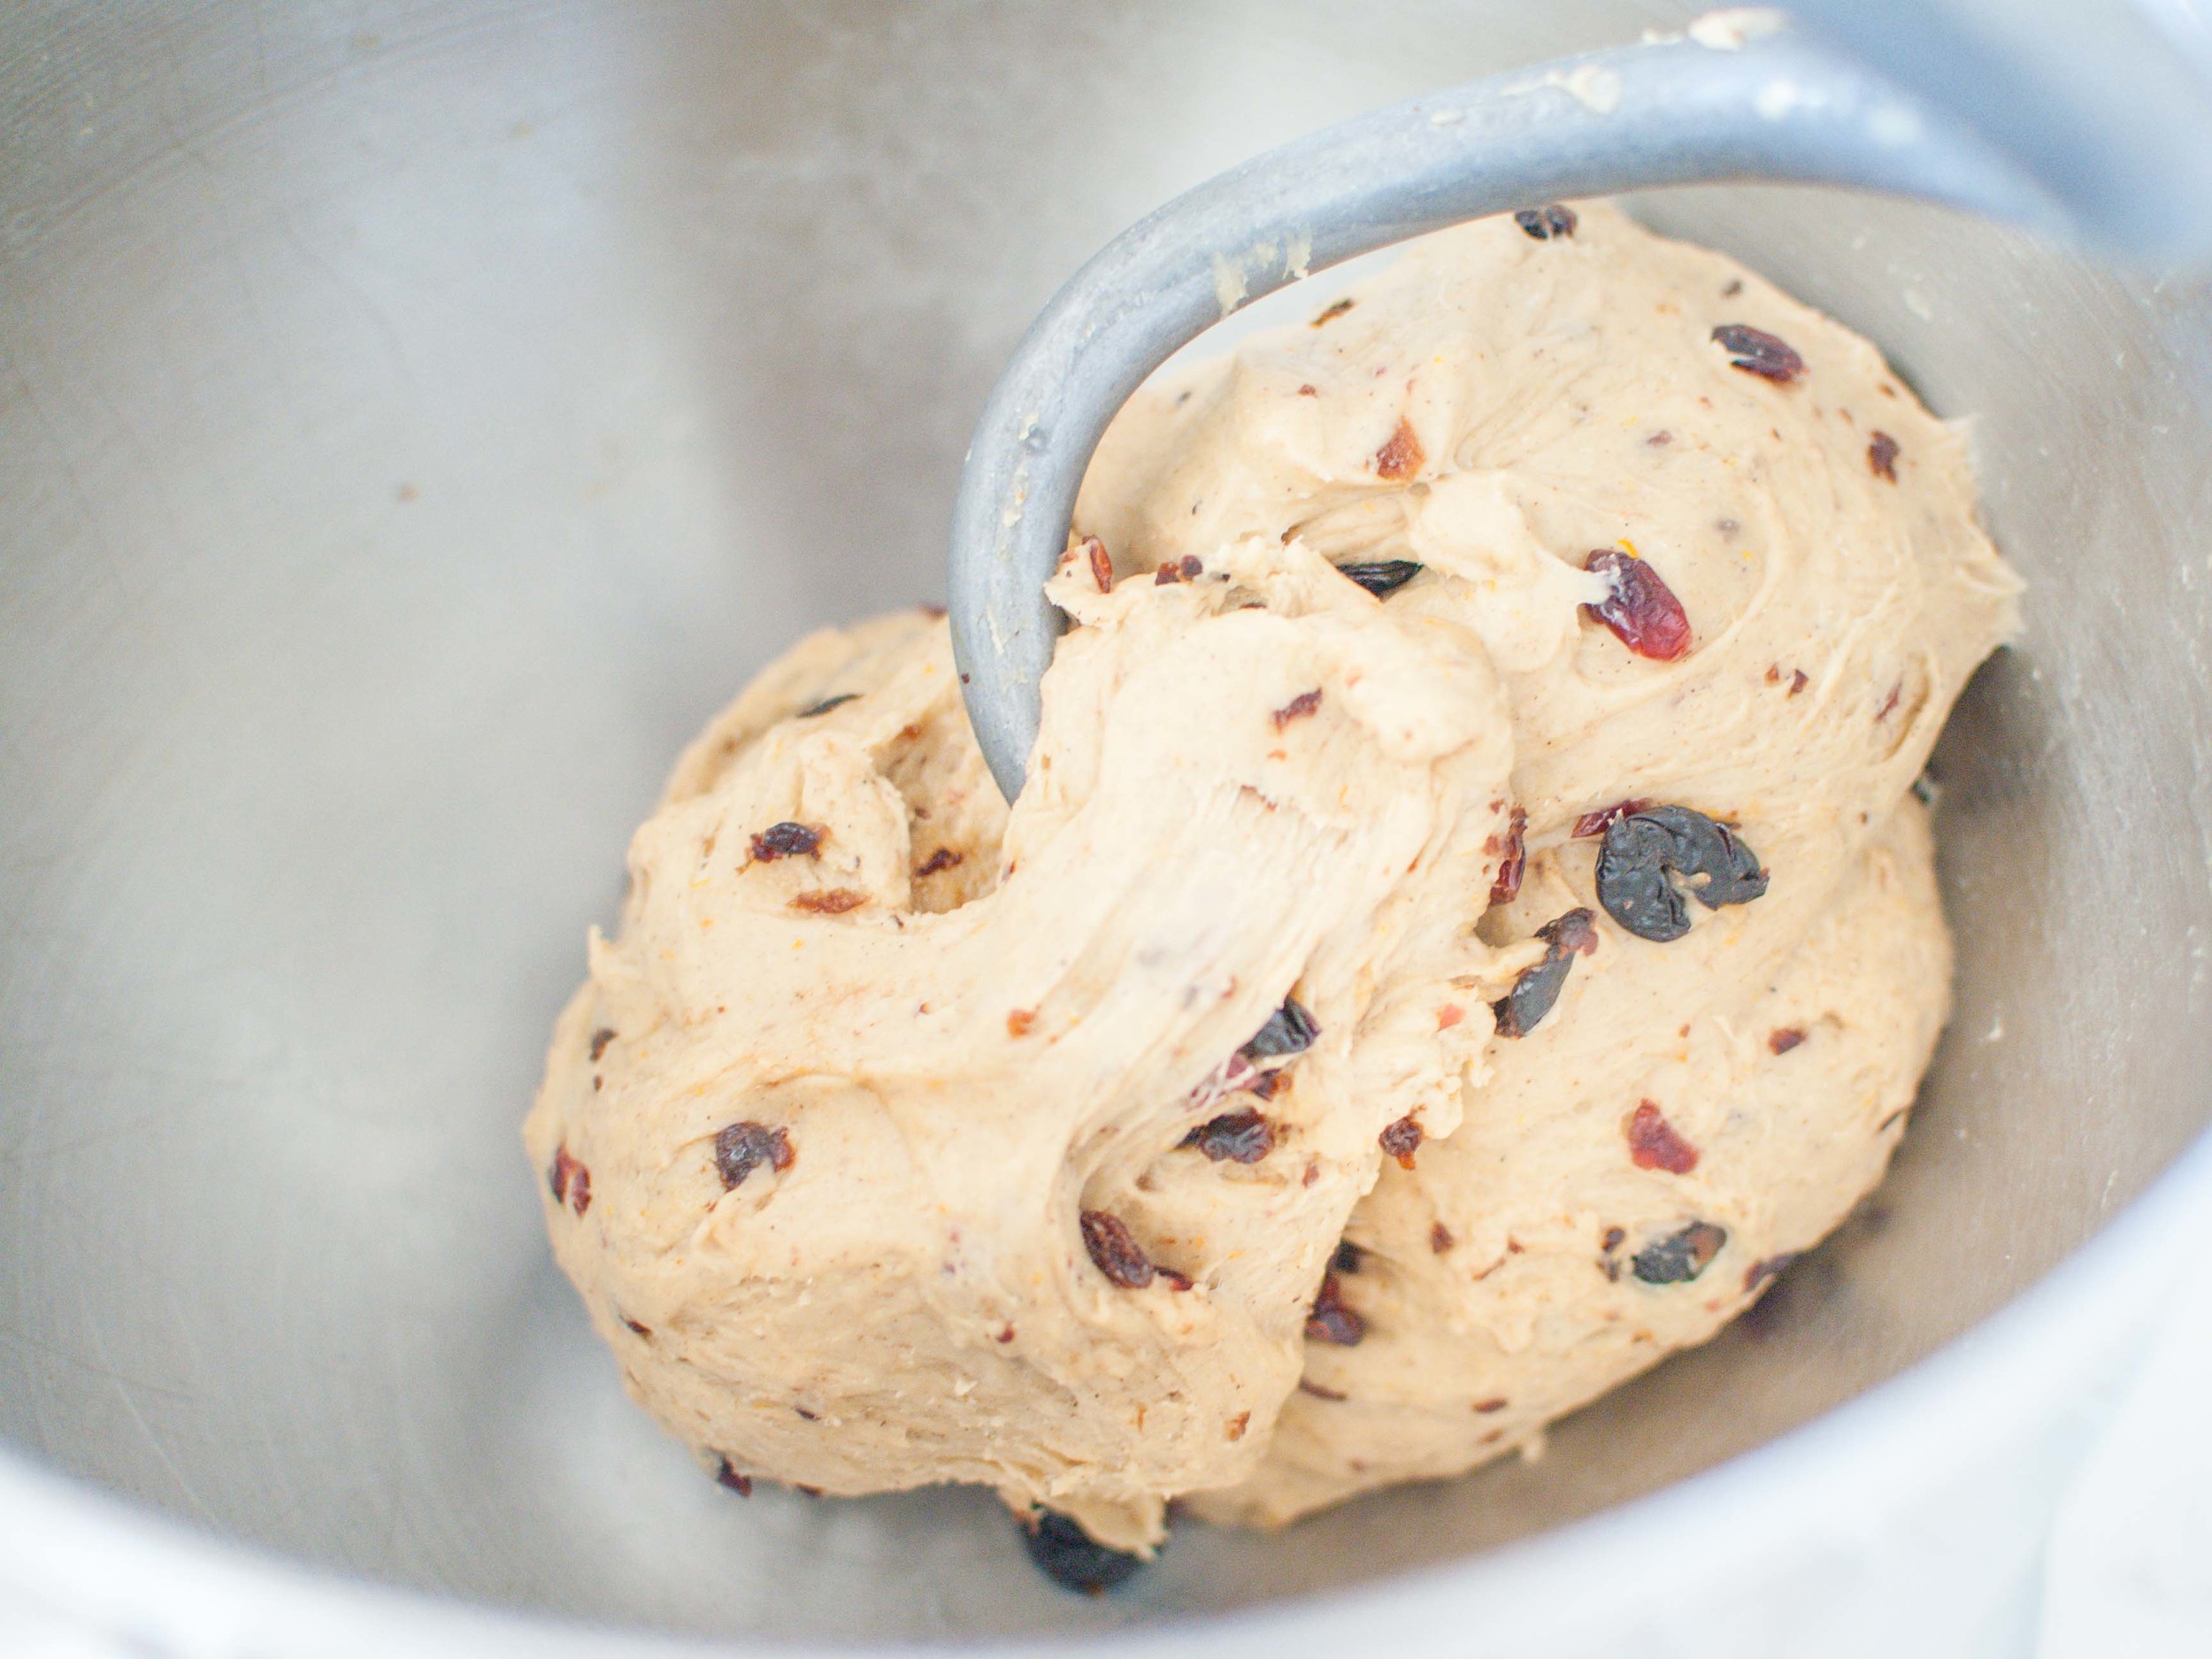
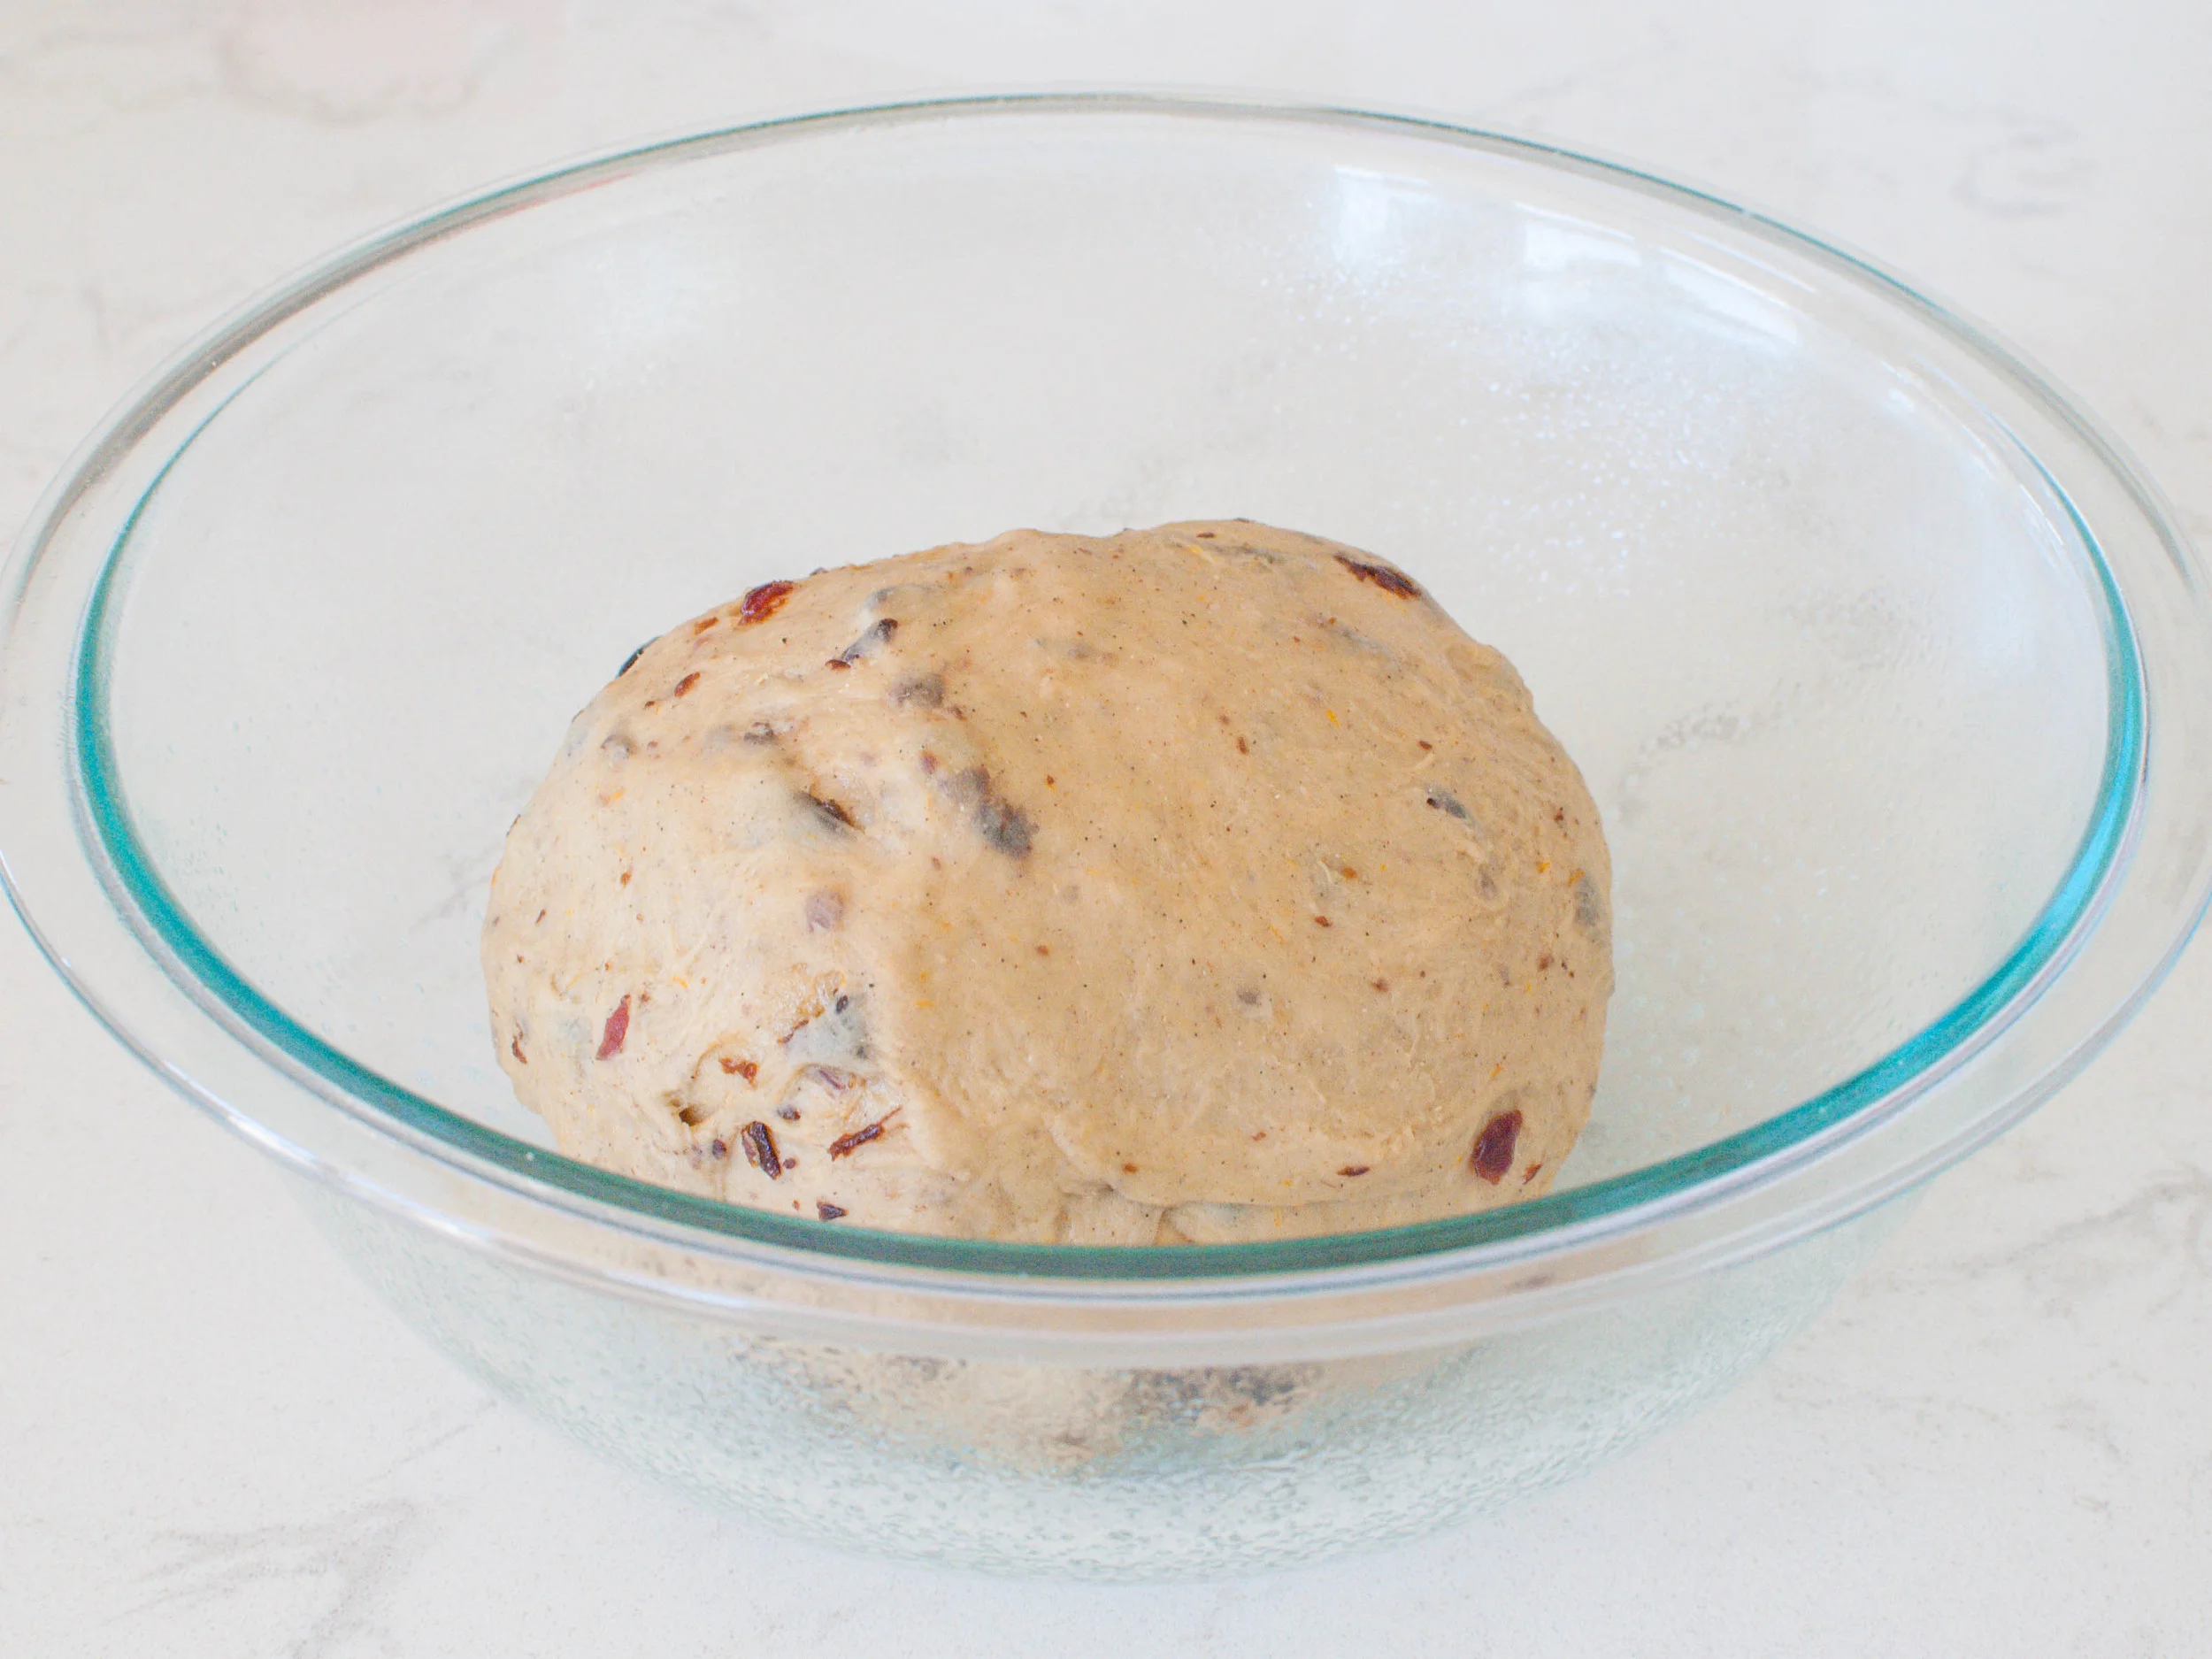
Combine bread flour, instant yeast, dried fruit, cinnamon, ginger, nutmeg, and cardamom into the bowl of a stand mixer (or a medium bowl, if kneading by hand). Remove vanilla bean pod and clove from the milk. Beat a room-temperature egg into the warm milk mixture, and pour into the flour bowl. Knead using a stand mixer fitted with a dough hook (or by hand), adding additional warm milk 1 tablespoon at a time, if the dough seems dry. Keep kneading until the dough is silky and elastic (about 5 minutes or a little longer by hand). Lightly grease a large bowl with oil or butter. Form the dough into a ball and place inside the greased bowl. Cover with plastic wrap and set in a warm place (like an oven with the light turned on or a sunny window) to rise until double in size (about 1 to 1 1/2 hours).

Preheat an oven to 425 degrees F. 

Punch the dough down, and knead it again by hand until it is smooth and elastic - 2 or 3 minutes. Divide into 12 equal pieces and roll each into a ball. Place the buns on a baking sheet lined with parchment paper or a silpat, so that there is a little space between them. Using the back of knife (any one will do), score the tops of the buns with the imprint of a cross. Cover loosely with a kitchen towel or plastic wrap, and let rise for about 45 to 60 minutes, until puffy and roughly doubled in size.

Make an egg wash by beating one egg with a bit of milk. Brush the tops of the buns with the egg wash. Then, mix the flour, sugar, and water into a smooth, thick  paste. Using a squeeze bottle or teaspoon, dribble two lines over the buns in the indent of the cross. Bake buns for 15-20 minutes, until golden brown.

When the hot cross buns come out of the oven, brush each one with a little honey to give them a sweet and shiny disposition. If the honey seems too thick, microwave the honey for 10 seconds to help liquefy it before brushing. Buns are best eaten the first day as is, or still warm and slathered with a pat of butter (my favorite). The next day, toast the buns and eat with a bit of butter and jam.

Lemon Ricotta Pancakes by Amy Cantu

Print Friendly and PDF
Lemon Ricotta Pancakes-0284.jpg


Recipe adapted from The Kitchn.

Time: 35 minutes
Serves: 4 (8-10 pancakes)

1 cup whole milk ricotta cheese
1 cup flour
1/2 teaspoon baking powder
1 1/2 tablespoons sugar
1/8 teaspoon salt
1 tablespoon lemon zest, finely grated (from 2 lemons)
3/4 cup milk
3 eggs, separated into yolks and whites
1/2 teaspoon vanilla
Butter, for the pan

Whisk together flour, baking powder, sugar, salt, and lemon zest in a small bowl. Combine ricotta, milk, egg yolks, and vanilla in a separate, larger mixing bowl. Add the dry ingredients to the ricotta and milk mixture, stirring gently until just combined.

Beat the egg whites with a handheld electric mixer until stiff. Fold the whites into the batter with a spatula.

Heat a griddle over medium-high heat. Melt a small bit of butter in the pan, just enough to coat the surface. Use a 1/3-cup measure to pour batter onto the hot griddle. Cook the pancakes for about 3 or 4 minutes, until the undersides are golden and you see a few bubbles popping through the pancakes. Flip the pancakes and cook another 2 to 3 minutes, until golden. Repeat with the remaining pancakes.

Serve the pancakes immediately, with maple syrup, fruit jam, lemon curd, or powdered sugar and a squeeze of lemon.

Lemon-Berry Muffins by Amy Cantu

Print Friendly and PDF
Lemon-Berry Muffins


Total time: 30 minutes
Servings: 12

2 cups all-purpose flour, spooned and leveled
2 teaspoons baking powder
1/2 teaspoon kosher salt
Zest from 1 lemon
2/3 cup granulated sugar
1/2 cup (1 stick) unsalted butter, melted and cooled
1/2 cup whole milk
2 large eggs
1 1/2 cups mixed berries (blueberries, strawberries, blackberries, etc.)
2 tablespoons turbinado sugar, optional

Preheat oven to 375° F. Line 12 muffin cups with paper liners or coat with nonstick cooking spray. 

In a large bowl, whisk together the flour, baking powder, lemon zest and salt.

In a medium bowl, whisk together the granulated sugar, butter, milk, and eggs. Add to the flour mixture and stir until just combined (a few flecks of flour is OK). Fold in the berries (do not overmix).

Spoon the batter into the prepared muffin cups and sprinkle with turbinado sugar, if using.
Bake until a toothpick inserted in the center of a muffin comes out clean, 20 to 25 minutes. Let cool in the pan for 5 minutes. Transfer to a wire rack to cool completely or serve warm.